Burnt Pine Redesign | Cara McBroom

SONY DSC
I couldn’t resist the rhyme! This is a project I finished two years ago. I never claimed to be a punctual poster, but better late than never, right? This home had some beautiful features, but they were overshadowed by darkness. That’s all–just a lack of light! My job was to furnish this beautiful home, and add a little brightness and contrast!
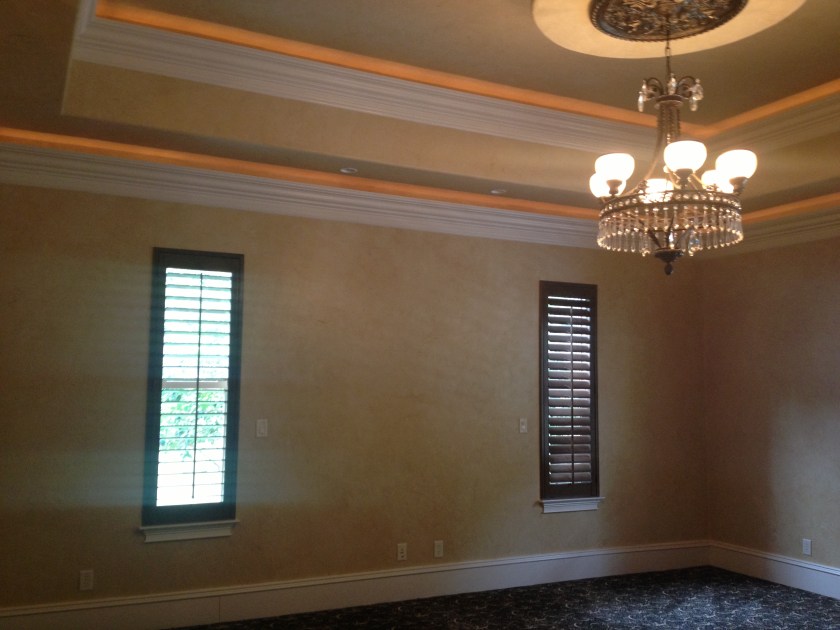
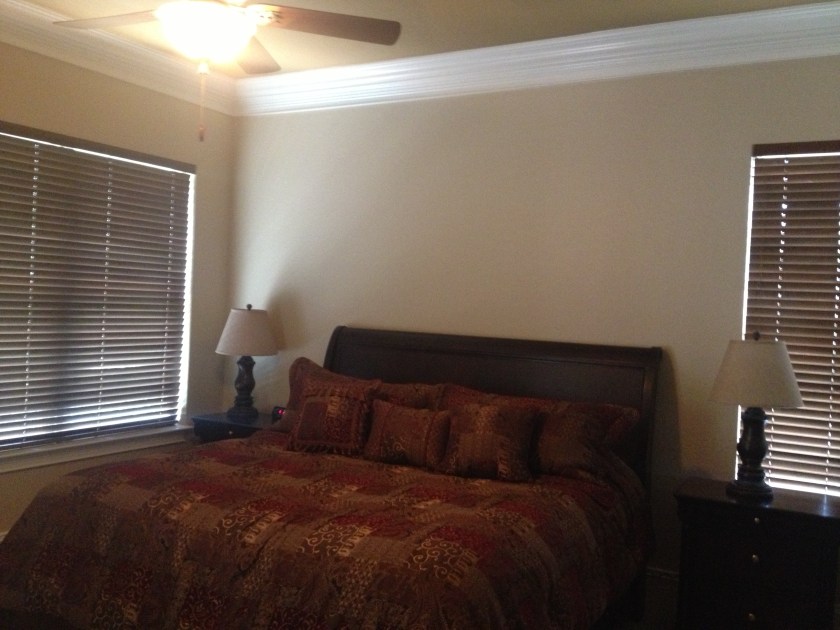
Master Bedroom BEFORE

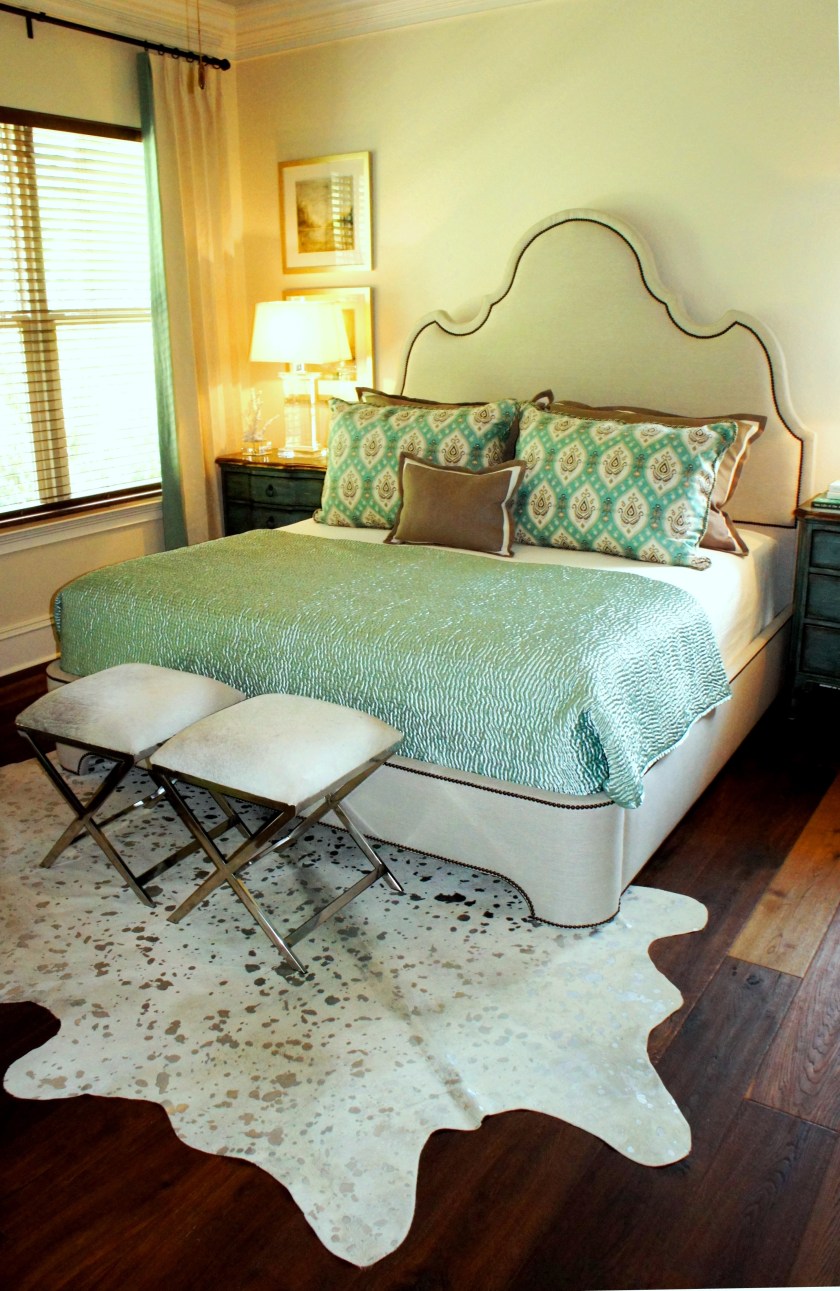
Master Bedroom AFTER
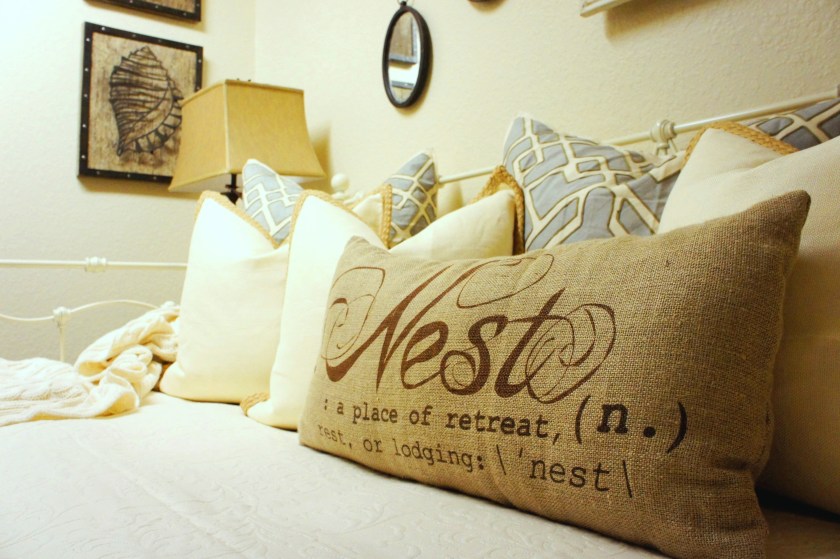
This may be my favorite Master Bedroom design, to date! I wish this were MY room! We replaced the patterned carpet with hand-scraped wide plank wood. I chose the most beautiful creamy paint color for the walls to brighten things up! All of the walls had a faux plaster finish in a goldish tan undertone–I wanted to KEEP the texture, but amp up the lightness so that the wood floors and other wood pieces would have some contrast! So, the paint has a pearlescent finish that’s very subtle, but emphasizes the texture, and is so much richer than flat or satin.

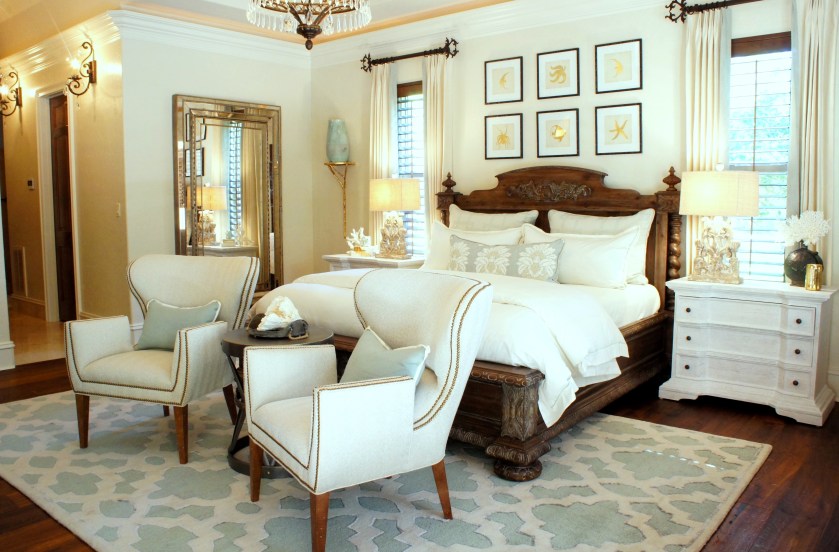
Chalk painted nightstands help to lighten and balance the dark, carved wood king bed. Crisp cream drapes brighten the dark shutters, and light, crisp, fluffy bedding screams “get in!”. The large mirror helps to reflect light back into the room, but is also a jewelry cabinet! A girl’s dream!

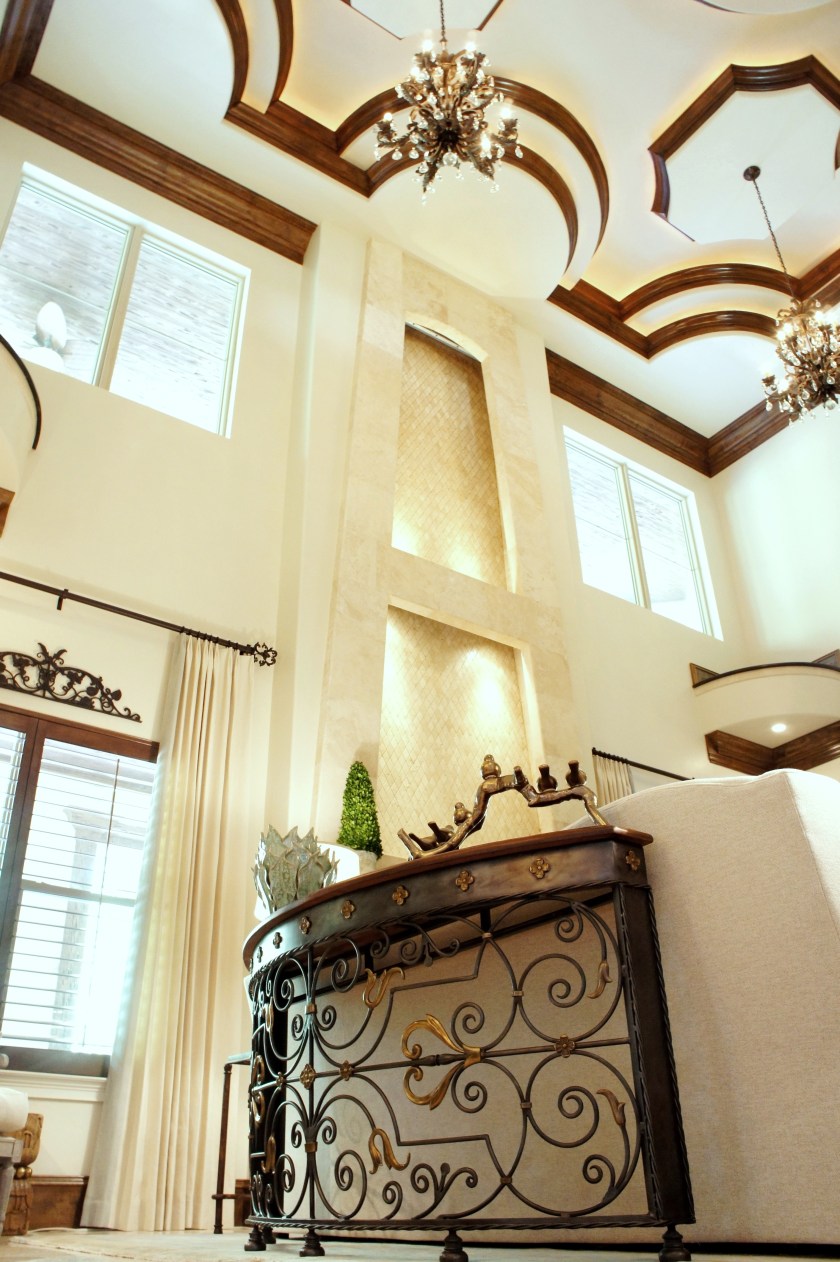
Living Room:
Living Room BEFORE
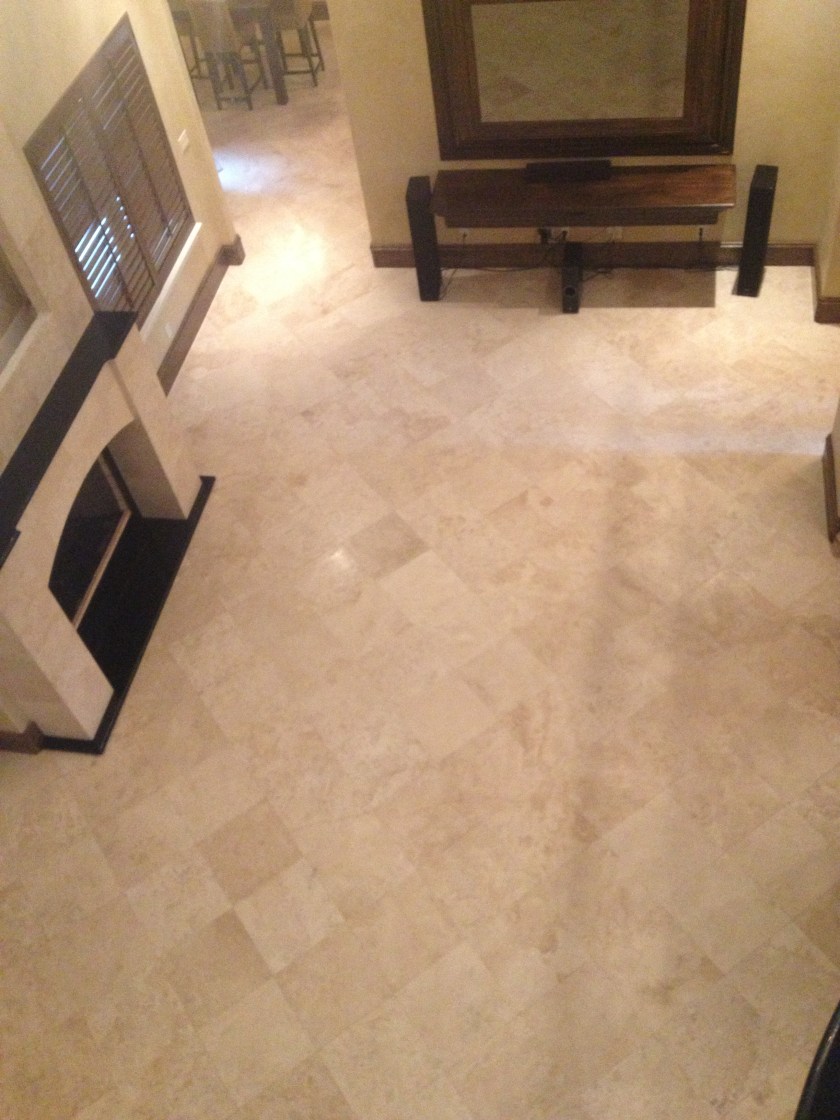
Living Room BEFORE

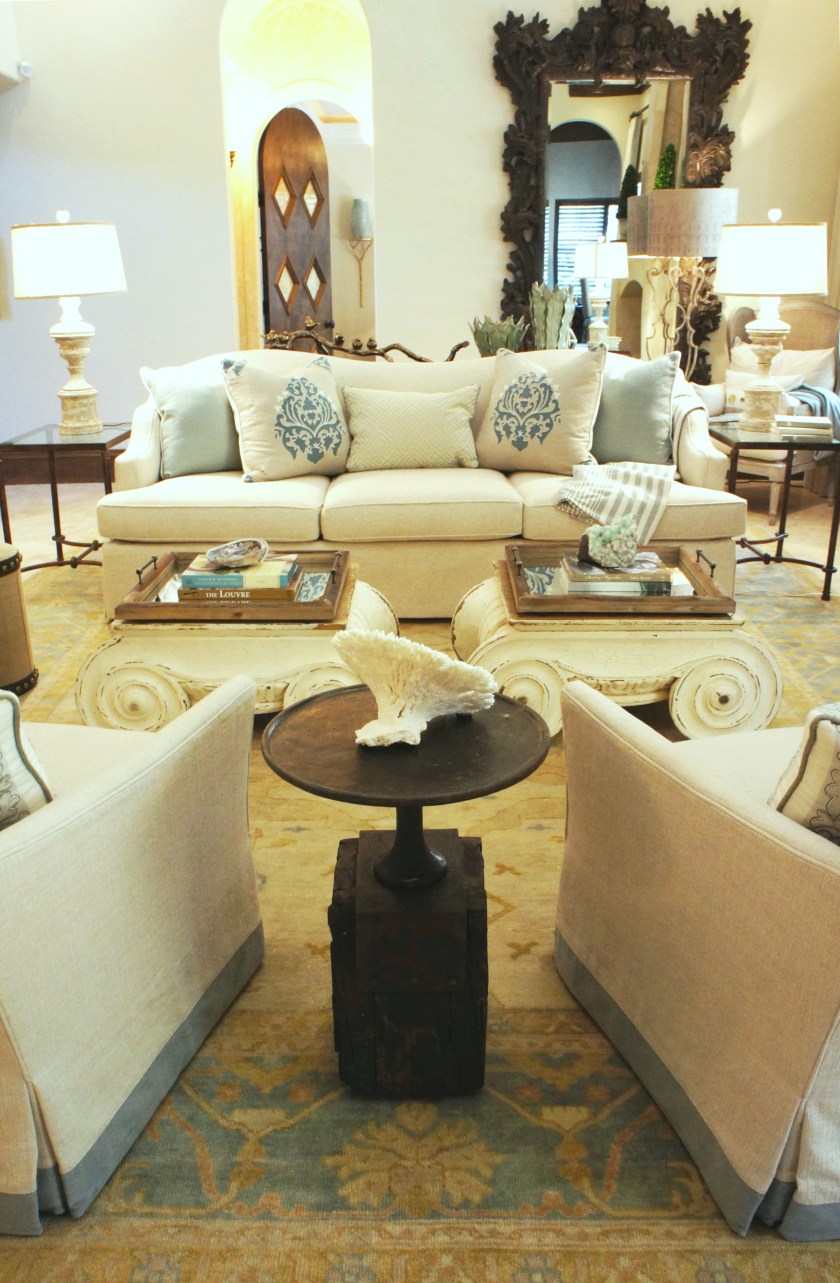
Living Room AFTER
In addition to painting the walls for crispness, we added cream window treatments, and an assortment of creamy painted and upholstered furniture. One gorgeous faded Oushak rug anchors the seating arrangement, and a custom-built entertainment cabinet tames the cables and wires from before.
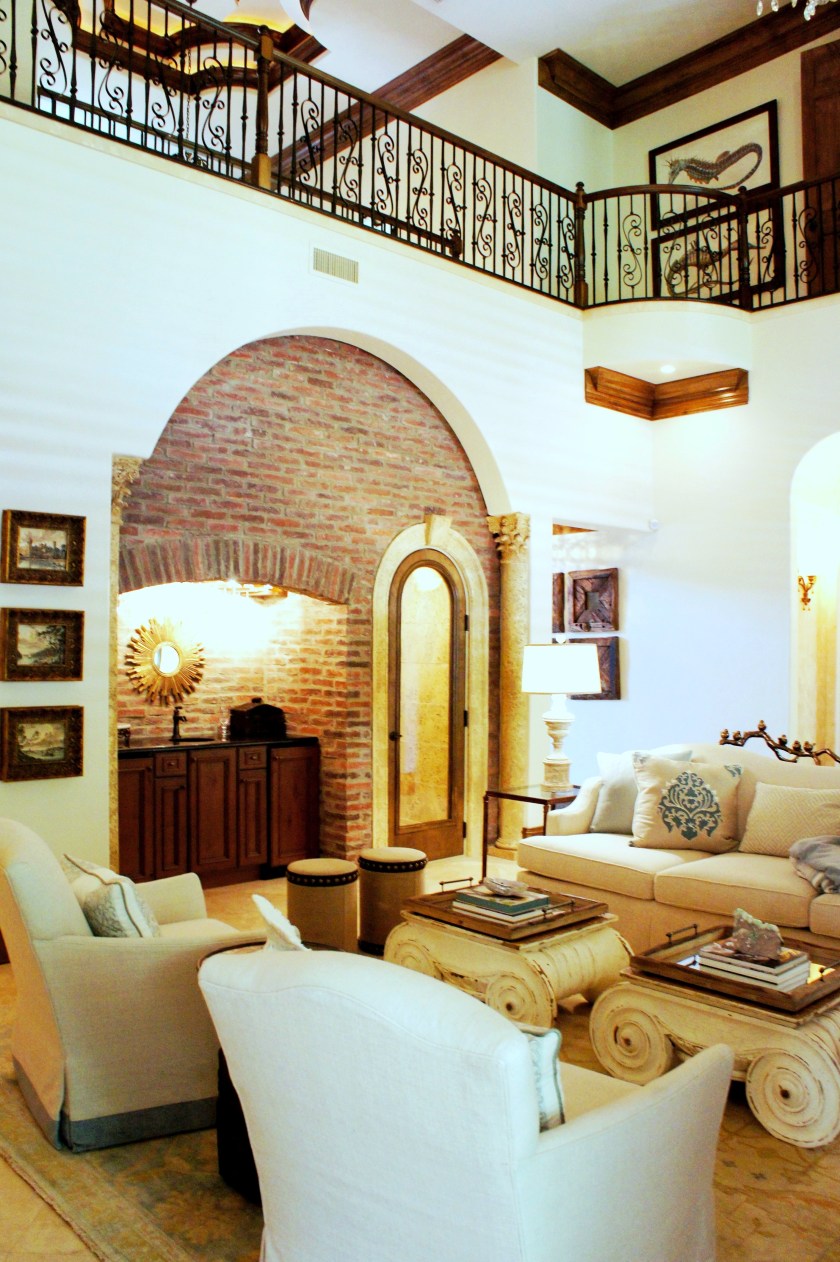
I spent a lot of time holding cream paint chips up to the stone in every room. I wanted the color to blend well with all the stone, but not go gold or yellow. I am so happy with the final result! I love how the brick seems so textured in contrast.

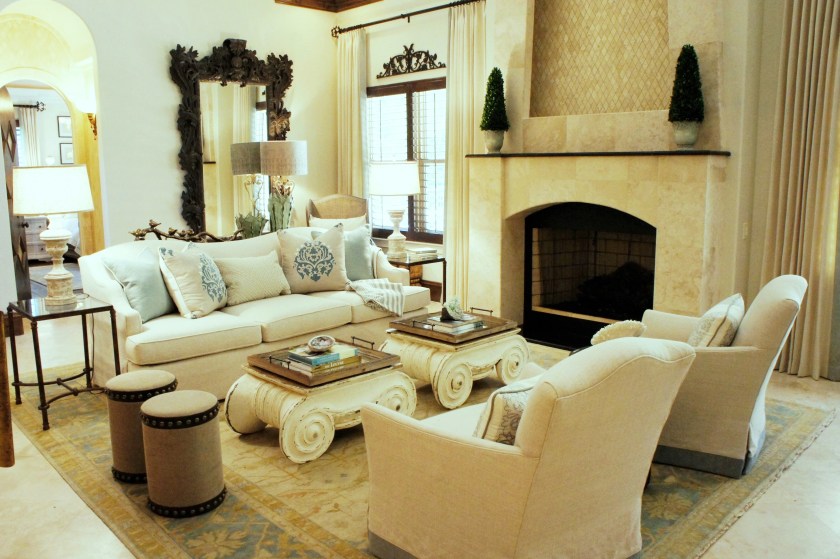
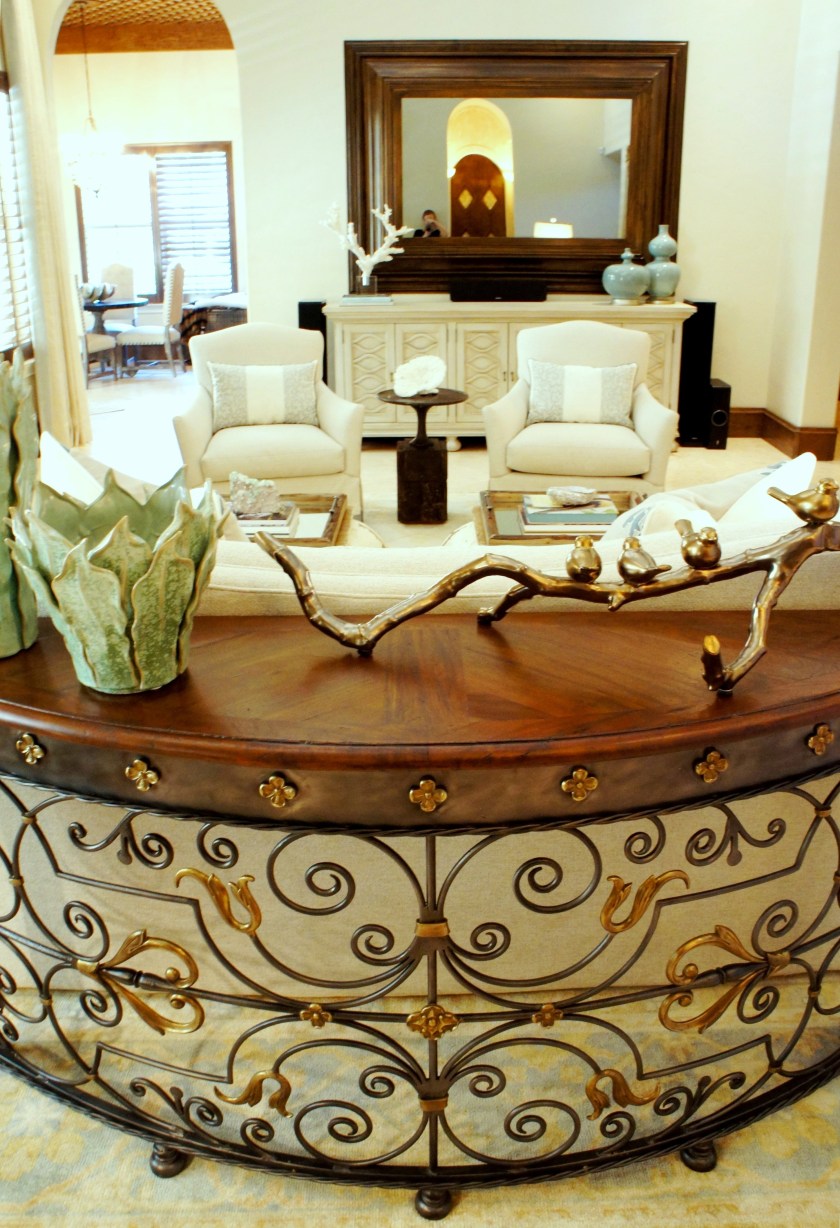
I wanted to find something dark, but open and rich to sit behind our light linen sofa! I love the way the scrolled ironwork stands out!

Media Wall BEFORE

Television Console Concept
I had a vision for the entertainment console, but couldn’t seem to find anything long enough to anchor this ginormous framed television! I commissioned Armored Frog to build me this beautiful cabinet, and then paint it a beautiful, crusty antique white.
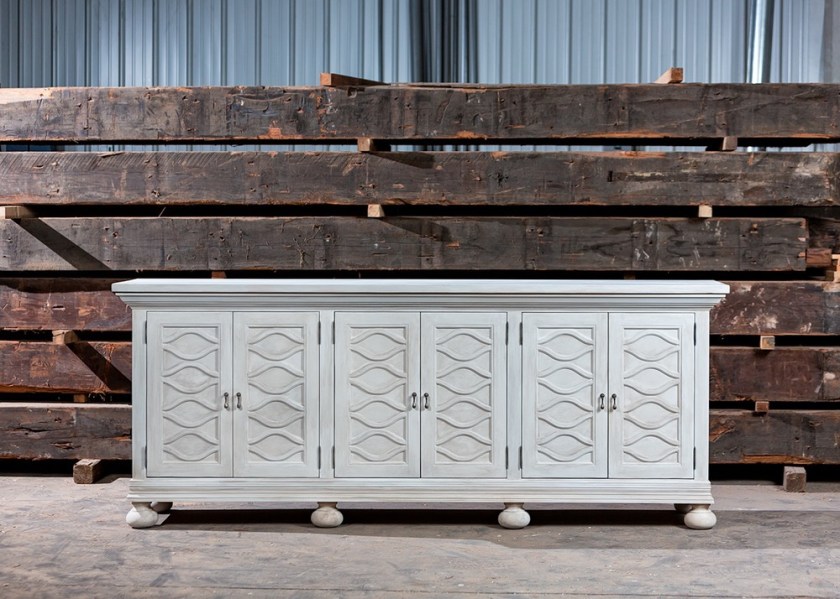
Here’s the new cabinet in Armored Frog’s Studio, before delivery!
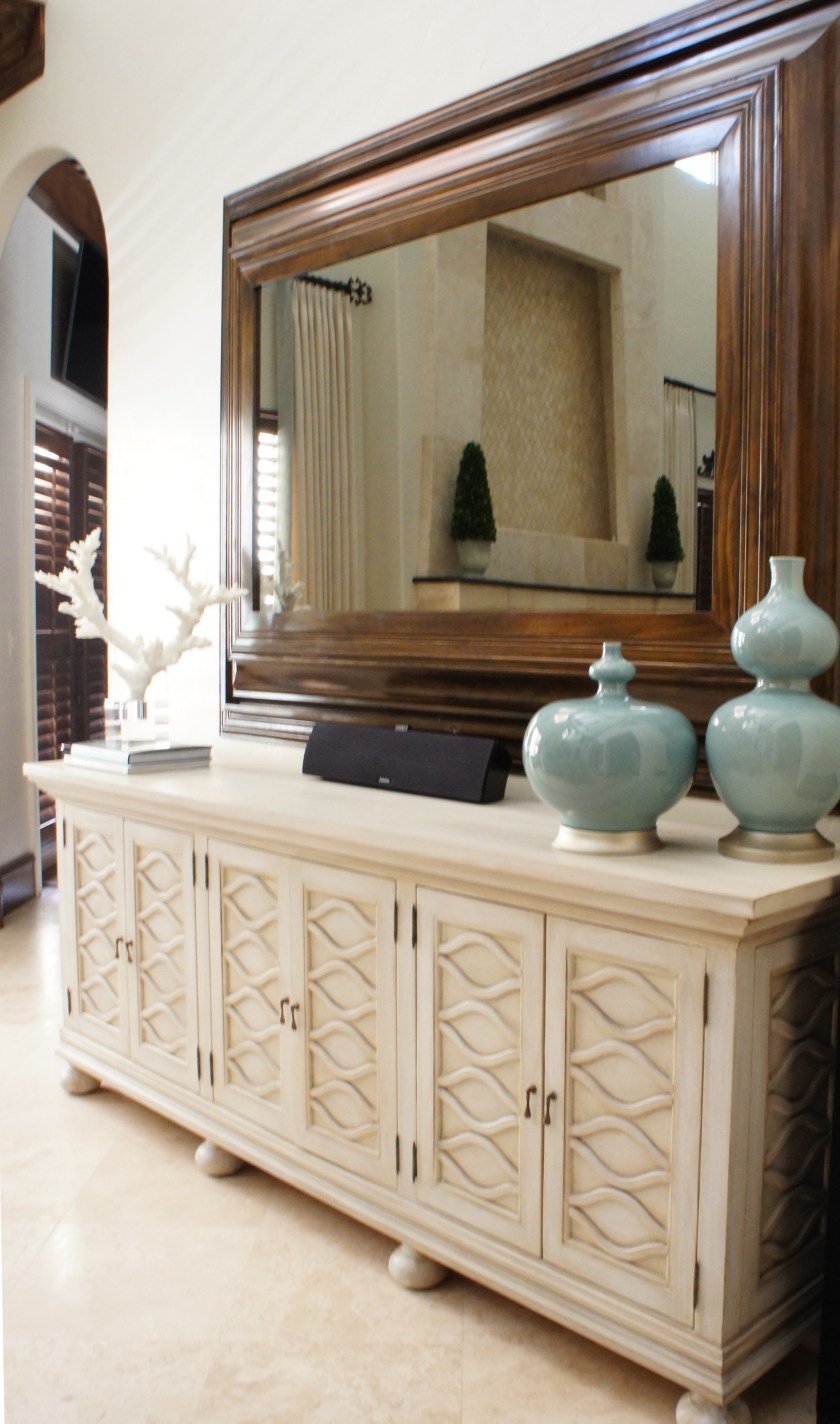
Media Wall AFTER
Guest Room BEFORE
Guest Bedroom AFTER
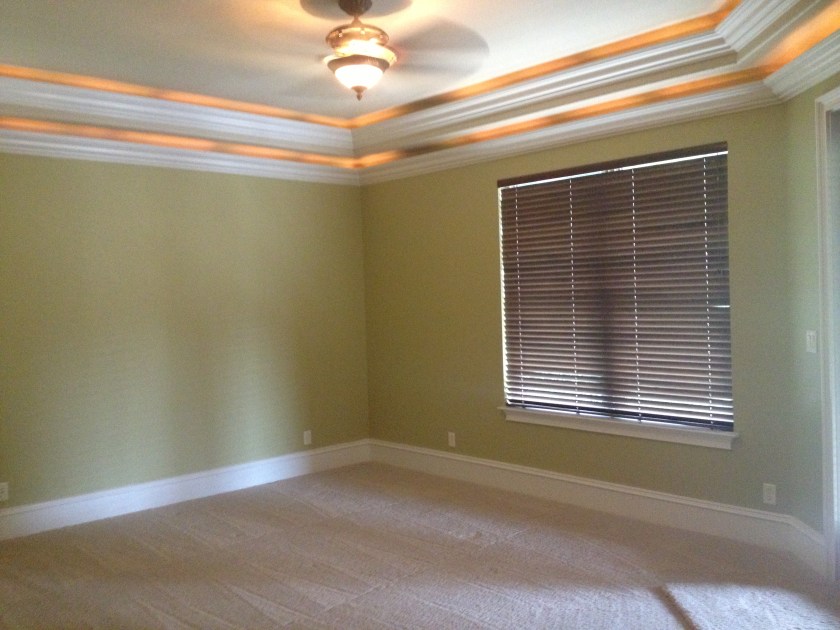
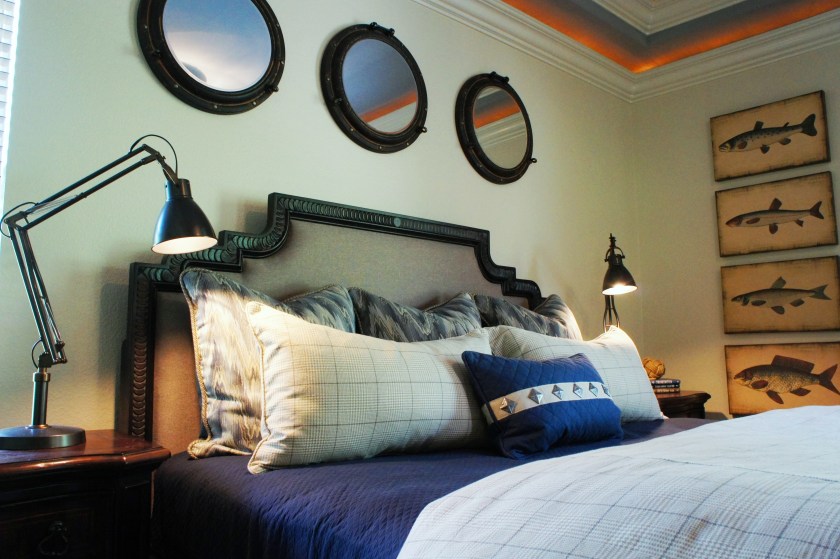
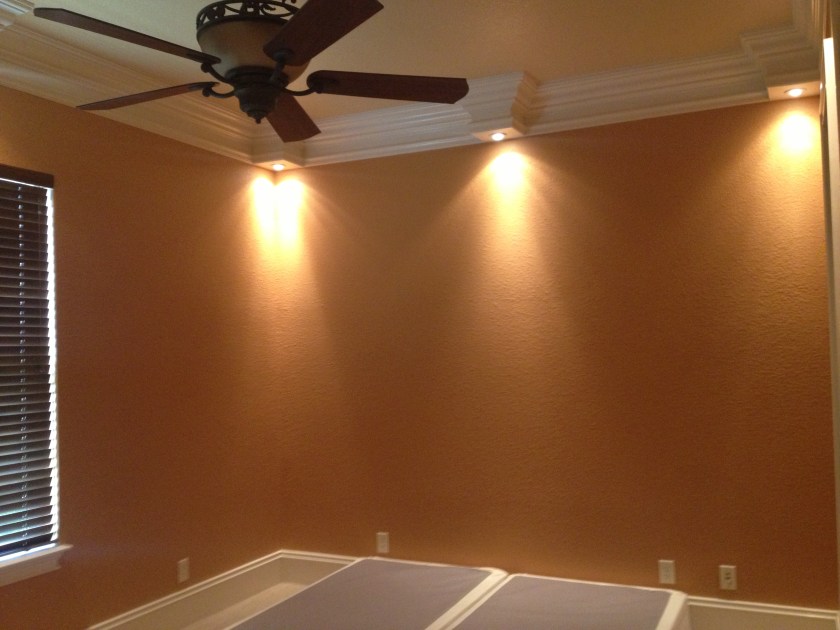
Boy’s Room BEFORE
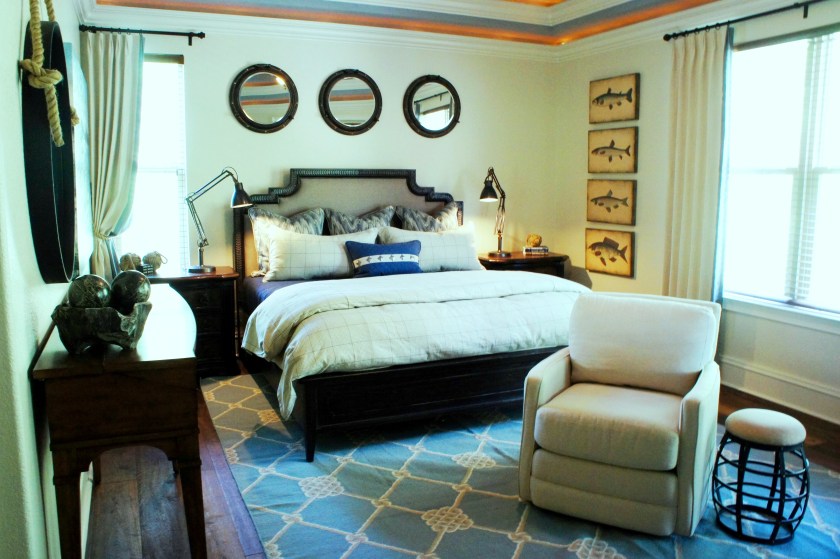
Boy’s Room AFTER
In the boy’s room, we brightened the walls, added some color to the ceiling, and finished the windows off with some soft drapes.
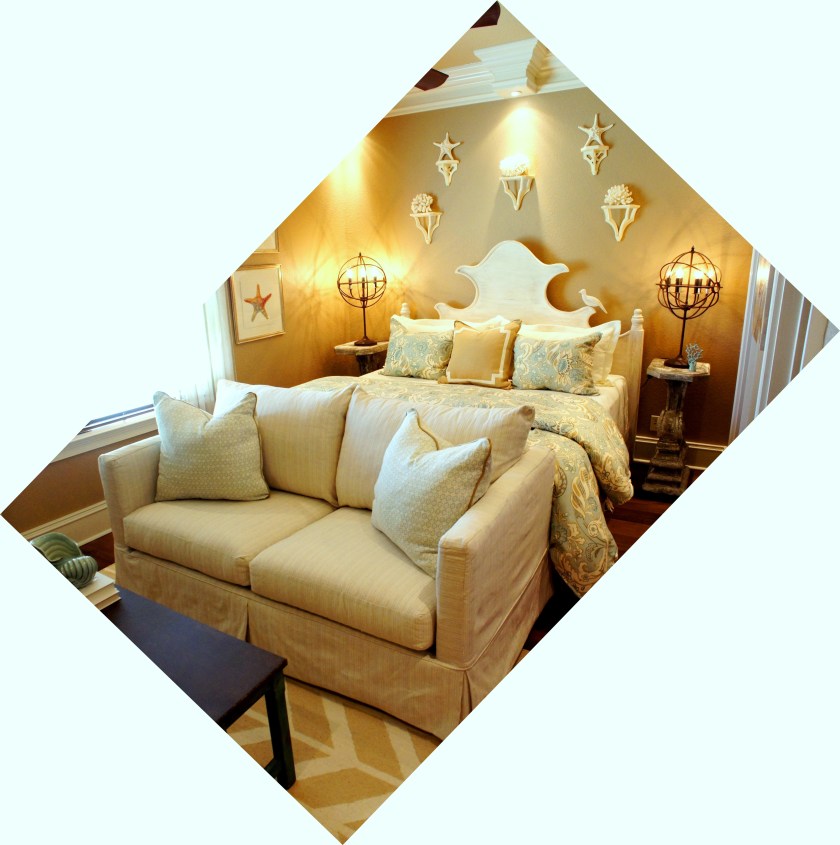
Guest Bedroom 2 BEFORE

Guest Bedroom 2 AFTER
Don’t judge my photo-taking skills! This room was hard to photograph!
In the second guest bedroom, we painted the walls a slightly less reddish camel color than the pumpkin color that was there before. This made the room a tad lighter, but provided a rich backdrop for my white painted headboard.
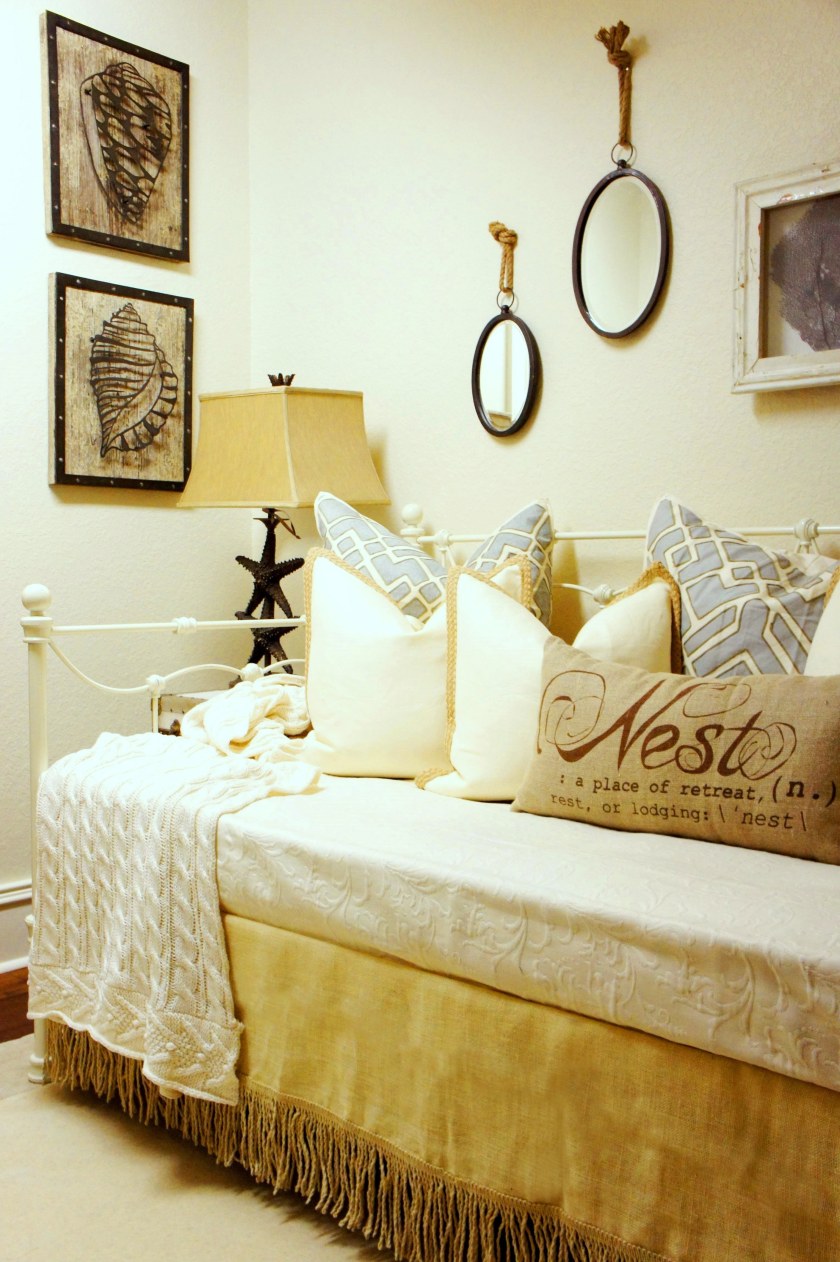
Attic Room
Next, we have a cute little attic room! We turned this room into a small media viewing area, with a daybed and some built-in cabinet storage.

Kitchen
Lastly, I can’t talk about this project, without giving kudos to my amazing painter, who hand painted each square behind the ceiling lattice in the kitchen! I actually felt bad asking them to do this, but they executed it flawlessly!
Contact me if you need help furnishing your home!
cara@lovelaceinteriors.com
